Here are some tips on how to solve the matter. It is so simple that you could have thought of it yourself.
Basic knowledge:
What is a capacitor?
Nothing more than a little box to temporarily store electrons in.
Next, we need to remember what exactly makes a capacitor a capacitor:
A capacitor is made of two conductors, separated by an isolator.
The Capacitance is determined by:
- Area of the plates;
- Distance between the plates;
- Thickness of the plates.
In case of a varcap, plates are positioned parallel, so together they provide more area, e.g. more electrons can be stored.
There are a few more properties (temperature, moisture, material,
dielectric, a.s.o.), but these are not of interest for this article.
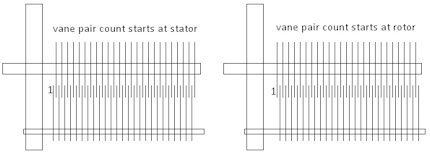
let us assume the meter indicates 148 pF.
- Count the number of
vane pairs:
We count 20.
This means 148 / 20 = 7,4 pF per vane pair.
We can also count the total of vanes: 40.
Which means that one vane equals 3,7 pF.
We want a varcap of 100 pF.
So 100 / 3,7 = 27,027 vanes have to remain on the varcap, 12,973 vanes
have to be removed. This implies two things: an impair number of pairs
will remain and we won't come exactly to the value we want.
Take off 11 vanes and take a measure. Than decide if you want to go on removing that extra vane. You can't put them back on!

Increase the distance between the last two vanes. On tuning capacitors in commercial broadcast receivers one can observe that the last vane is cut in parts to facilitate easy trimming.
Bringing the
value slightly up:
Add some material to the last vane to make more room for electrons:
apply a few soldering drops. This won't work in case of aluminium vanes.
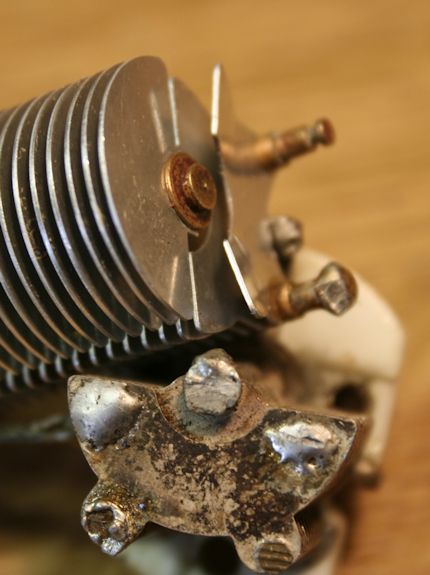
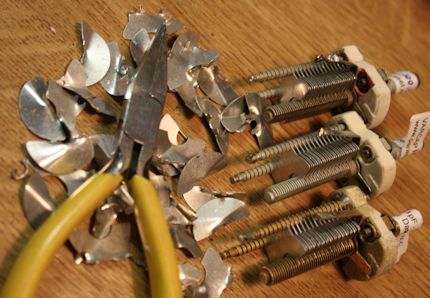
Looking at the photo's to the right, you can see two varcaps I deliberately ruined for this tutorial. The upper one has aluminium vanes, the one at the bottom has silver plated brass vanes.